


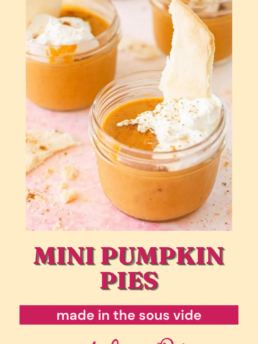
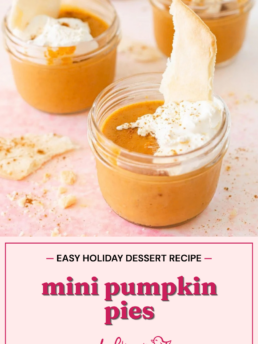
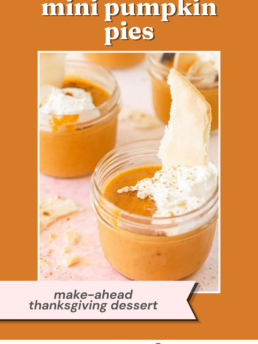
Mini pumpkin pies are cooked in mini jars in the sous vide for a rich, custardy texture and all of the warm, comforting flavors you expect from a classic pumpkin pie. Make up to a day ahead of time, then top with a dollop of whipped cream and pieces of pie crust just before serving. No more fighting over who has the biggest piece of pie!

This post may contain affiliate links which won’t change your price but will share some commission.
I hosted my first Thanksgiving in 2018 and did almost the entirety of my portion of the meal sous vide. Sous vide turkey breasts (that are never dry), sous vide confit turkey legs for those who prefer dark meat, and the creamiest sous vide mashed potatoes. And my guests didn’t expect anything different; I was about to launch my first cookbook, Everyday Sous Vide: It’s All French to Me, out into the world.
I’ve incorporated my sous vide into Thanksgiving every year since, and one surprising thing I absolutely love making in the sous vide? Pumpkin pie.
The texture? Outstanding — smooth and custardy, just the way it should be. The flavor? Perfect with just the right balance of sweet pumpkin and warm spices. It’s also a great option for gluten-free guests, but those who love pie crust can still add some before digging in!
And this mini pumpkin pie recipe frees up your oven for when Aunt Martha walks in with her stuffing and says, “I thought I’d cook this over here… 350 degrees for 20 minutes, here you go!” Thanks, Aunt Martha.
What readers are saying about this recipe
“Seriously the best and tastiest pumpkin pie I have ever had! Love this small batch recipe!!” -Rylee
“Being G/F I have missed having Pumpkin pie, this recipe made me so HAPPY. It was easy & so good!” -Jody
“So delicious, and simple to make!! The texture is just right. These are a definite add to our table for Thanksgiving!” -Kristi
A note from Chelsea
2026 update: I first shared this sous vide mini pumpkin pie recipe here in 2019. It’s one that readers have returned to again and again, adding it to their Thanksgiving menus year after year. I have updated the post to include more tips to help you along the way, but the recipe remains unchanged and as classically delicious as ever.
My top mini pumpkin pie tips
After years of making these mini pumpkin pies, I’ve dialed in on several things that really make a difference in this recipe:
- Pick “serving size” jars: These sous vide pumpkin pies are served right in the jar, and the pie filling is rich, so don’t go too big. I like to use quarter pint jars for mine, and that’s the biggest you should go in my opinion. You could go smaller if you are serving other desserts as well, such as crème brúlée, and want guests to be able to try a bit of everything.
- Sweetened condensed milk simplifies the ingredient list: Most pumpkin pie fillings use evaporated milk. I prefer to use sweetened condensed milk in mine, which cuts out the need for other sweeteners and makes this a 5-ingredient recipe.
- No lumps = a smooth pie filling: Don’t try to cut corners when whisking together your pie filling. Whisk until it’s super smooth without lumps. If you need to, give it a couple pulses with an immersion blender just to get it super well combined.
- Don’t over-tighten the lids when cooking: Only tighten the jar lids to fingertip tight when cooking, meaning only tighten it as far as you can with just the tips of your fingers. You want to see air bubbles escaping, otherwise the jars could break. These days, I like using Weck Jars, because the metal clamps mean you don’t have to worry about over-tightening the lids.

I’m so glad you found this recipe!
I can’t wait to be a part of your sous vide cooking today, and hopefully more to come!
I’ve been passionate about sous vide for almost a decade now. I take a different approach from other sous vide experts. While I love the science of sous vide, I want it to be an approachable cooking technique for everyone, and I don’t want you to sweat the details.
If you’re new to sous vide, make sure to read through this blog post or consider joining Sous Vide School.
I also have two sous vide cookbooks I think you’ll love: Everyday Sous Vide and Sous Vide Meal Prep.
Got questions?
Leave a comment and I’ll get right back to you!
How to make mini pumpkin pies in the sous vide
Like most sous vide desserts, making these mini pumpkin pies in the sous vide is incredibly simple. Simply whisk, pour into jars, cook for 1 hour, and refrigerate. That’s the amazing thing about cooking sous vide: there’s no opening the oven over and over and wondering if maybe, soon, the pie is ready.
Start adding canned pumpkin, sweetened condensed milk eggs, pumpkin pie, spice, and salt to a mixing bowl. I prefer to use something with a spout to make it easy to pour into jars!

Then whisk it all together until smooth and no lumps remain.

Pour the mixture into quarter pint sized jars. This size jar gives you 5 servings, but you could get more if you use smaller jars.

Like most sous vide desserts, these mini pumpkin pies are cooked at a relatively high temp for a short short time (for sous vide): 185°F for 1 hour.
After removing the jars from the water bath, set them on the counter to cool to room temperature, then refrigerate for at least 2 hours or up to overnight.
Crust options
If you love pie crust, don’t worry: You don’t have to miss out with these sous vide pumpkin pies!
Bake a sheet of pie dough (or homemade pie crust) according to package/recipe directions until golden. When serving the pies, break the crust into pieces and use it to garnish the jars along with a dollop of whipped cream!
For something even fancier, you could cut the pie dough into seasonal shapes with cookie cutters. Maybe little pumpkins or fall leaves??
Don’t want to mess with the pie crust? Skip it or swap it for graham cracker crumbs instead.
Make-ahead and storage
One of the many, many reasons I love this pumpkin pie recipe so much is that I can make it up to a day before I plan to serve it. Getting things done and checked off the list ahead of time makes hosting Thanksgiving so much more enjoyable, in my opinion.
You can keep leftovers (if there are any!) in the fridge with the lids on for up to 3 days.
Frequently asked questions
No! If you want to divide the pie filling into smaller jars for more servings, they will still cook for 1 hour at 185°F.

Get the Recipe:
Sous Vide Pumpkin Pie
Ingredients
- 1 (15-ounce) can pumpkin puree
- 1 (14-ounce) can sweetened condensed milk
- 2 large eggs
- 2 tsp pumpkin pie spice
- 1/2 tsp salt
For serving
- 1 unbaked pie crust, optional
- 1/2 cup whipped cream, optional
Equipment
Instructions
- Using an immersion circulator, preheat a water bath to 185°F.
- In a bowl, whisk together all ingredients except pie crust and whipped cream. Pour evenly between 5 quarter pint jars.1 (15-ounce) can pumpkin puree, 1 (14-ounce) can sweetened condensed milk, 2 large eggs, 2 tsp pumpkin pie spice, 1/2 tsp salt
- Screw lids onto jars until just fingertip tight. Drop into preheated water bath and cook for 1 hour.
- Remove jars from water bath and let come to room temperature on the counter. Place in fridge for at least 2 hours.
- Before serving, unroll pie crust onto a piece of parchament paper on a baking sheet. Bake according to package instructions, until just golden brown.1 unbaked pie crust
- To serve, top each jar of pie with whipped cream and a broken piece of pie crust.1/2 cup whipped cream
Notes
Jars
- Use smaller jars for smaller servings. I’d recommend quarter pint (4-ounce) jars being the largest you go. You do not need to adjust the cooking temperature or time if using smaller jars.
- Make sure to only screw your jar lids on to fingertip tight, meaning only as tight as you can screw on with just your fingertips. You want to see air bubbles escaping when you drop the jars into the water! If you don’t, the jars may break during cooking.
Gluten-free option
- For gluten-free pies, omit the pie crust at the end or use your preferred gluten-free crust. You could also top the pies with gluten-free graham cracker crumbs.
Storage
- Store cooled pies covered in the refrigerator for up to 3 days. Wait until just before serving to top with the pie crust pieces and whipped cream.
Looking for other sous vide desserts? Try my Sous Vide Cherry Cheesecake or Sous Vide Lemon Cheesecake!

Followed your recipe and I got 7 servings. Not complaining!
This is one that my husband would absolutely love! Such great flavors and love the idea of a single serve pumpkin custard!
Seriously the best and tastiest pumpkin pie I have ever had! Love this small batch recipe!!
How long can these be kept in the fridge for?
It’ll be best served on day 2 or 3, but up to 5 will be fine!
Can this be frozen after it had cooled?
I wouldn’t freeze this, unfortunately!
Being G/F I have missed having Pumpkin pie, this recipe made me so HAPPY. It was easy & so good! I used six half pint jar because that’s all I had multiples of and it worked out great because it left room for crushed gluten free graham crackers and whipped topping.
So delicious, and simple to make!! The texture is just right. These are a definite add to our table for Thanksgiving!
Yay! I’m so glad!