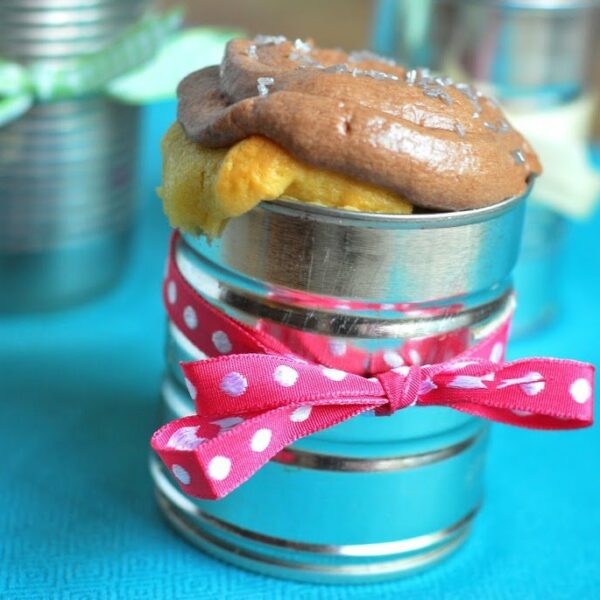
I have been stock-piling tin cans for weeks. Let me rephrase: I have been too lazy to take the recycling out for weeks. I found myself with lots and lots of cans of different shapes and sizes and thought, “There must be some fantastic way to repurpose these!” Then I remembered seeing something on Pinterest ages ago about cake and tin cans… I can’t for the life of me find that pin, but I rolled with it anyways! And I’m glad I did, because I think these are adorable!
To make the cake batter, I did one of my usual cake mix dress ups. For this one, I replaced the oil with melted butter and added a little bit of vanilla. It’s one of my favorites.
Then I grabbed an assortment of well-cleaned cans. I had enough cake mix to fill another small can, but another small can I did not have. Spray the inside of them with cooking spray. Even though I left the cake in the cans (you could remove it), it’s easier to eat if it’s not sticking to the side.
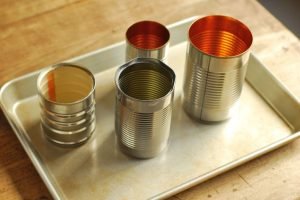
I filled each one about 3/4 of the way full. Please note: that was WAY too full! You should go about 2/3 of the way full. Don’t make my mistake, please. Cake poured over the sides, but luckily there was a cookie sheet to catch it and mouths to put it in.
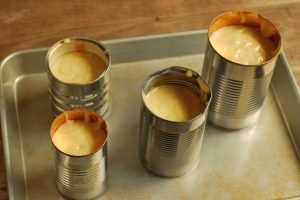
Pop ’em in a preheated oven for about 10 minutes, then remove the cans and cover them with foil. Return them to the oven and cook for another 7-15 minutes depending on the size of the can.
Make your frosting of choice in the meantime. I made a chocolate coconut cream frosting of which I took absolutely zero pictures because making frosting is just too exciting to pause for even a second. I did, however, include the recipe below. This frosting is so delightfully coconuty- it might be my new favorite!
Once the cakes are done, impatiently let them cool for as long as you can stand it. I cut ribbon to tie around the cans in the meantime to keep my hands busy. Then, when the cake is cool, cut holes in the centers of the cakes all the way down to the bottom of the can and remove the tube of cake. Then eat it. Fill the centers of the cakes with frosting. I did this because some of the cans were awfully tall and I thought it would be nice to get frosting all the way down, instead of just at the top. Besides, who complains about more frosting?
Then top the cakes off with more frosting, add some ribbon and sprinkles if you’re feeling especially girly, and you have made individually portioned cakes. Yes, I know that cupcakes serve that same purpose, but these are different and fun! And arguably easier. And resourceful because you’re using recycled cans. And just really really fun.
I was thinking it’d be fun to make your own labels for these. I’m definitely thinking some snarky labels for the Ducks vs. Beavers annual Civil War game may be in order. Let me know if you have any label inspiration for these!
Get the Recipe:
Cake in a Can
Ingredients
Cake:
- 1 box yellow cake mix
- 1 cup water
- 1/2 cup butter, melted
- 3 eggs
- 1/2 tsp vanilla
Assembly:
- 4-7 clean tin cans
- Cooking spray
- Foil
Chocolate Coconut Cream Frosting:
- 1/2 cup butter, room temperature
- 1/3 cup coconut cream, room temperature
- 1/2 tsp vanilla
- 2 tbsp cocoa powder
- 2 cups powdered sugar
Instructions
- Preheat oven to 350 degrees. Spray inside of tin cans with cooking spray.
- Mix together cake mix, water, melted butter, eggs, and vanilla. Beat at medium-high speed for 3 minutes.
- Fill each can about 2/3 with cake batter. Place tins on a cookie sheet.
- Bake in preheated oven for 10 minutes. Remove tins from oven and cover with foil. Return to oven and cook for an additional 7-15 minutes, depending on size of can, checking every 3 minutes or so. Cake is finished when knife can be inserted all the way through and come out clean.
- While the cake is baking, make the frosting. Beat together butter and coconut cream until light and fluffy. Add vanilla and cocoa powder mix until combined. Add the powdered sugar 1/3 cup at a time until frosting has reached desired consistency.
- When the cake is done, let it cool for 15-20 minutes.
- Cut holes in center of cakes all the way to the bottom of tins and remove center cake. Fill the centers with frosting and top with additional frosting. Decorate tins as desired.

