Growing My Blog: Drawing Traffic with Pinterest
Before I get into this post, I have two exciting things to share with you! The first is that I just launched a brand new section on my blog devoted to sharing what I’m learning with other bloggers. I talk about what I’m trying on my blog, resources and equipment I’m using, and my favorite blogging things around the interwebs. Click “Blogging Resources” above or just click here to check it out!
In the spirit of full disclosure about my blog, here’s my second piece of exciting news: I just reached 500,000 all time views! For a small-time food blogger like myself, this is huge and I am so incredibly excited about it! Almost 100,000 of those views have happened since I’ve been in South Africa and been able to devote more time to the blog, so I’m glad to see it paying off!
Aaaand thank you for taking that time to celebrate with me, on to the good stuff! This post is about what I’ve learned about using Pinterest to help my blog in these last few months. It’s no secret that Pinterest is an enormously helpful tool for bloggers. If you’re lucky enough to have a pin go viral, it can make up the majority of your views for a given day and give you a traffic spike that will last over a week or so.
Although a lot of the process seems like it may be up to the Pinterest gods and whether or not they’ll have mercy on you that day, you do have some control over how well a pin will do.
Monitor Your Blog on Pinterest.
Before we get into strategies for making a pin more popular, you should know how to track pins from your blog. Luckily, it’s really easy. Just type in this URL:
http://www.pinterest.com/source/YOUR BLOG’S HOMEPAGE URL
Replace “YOUR BLOG’S HOMEPAGE URL” with, well, your blog’s homepage URL! Make sure it’s the homepage, not just the link to a specific post. So for my blog, it’s:
http://www.pinterest.com/source/ducksoven.blogspot.com/
It’s so cool to see which pins are doing well and what posts might need a little more promotion on Pinterest!
Take a Pin-worthy Photo.
This seems like an obvious one, right? Maybe, but there are a lot of things that could mean. The biggest tip I’ve received about making a photo “pin-worthy”, in addition to the obvious “take a pretty photo”, was to take more vertical photos. Up until three months ago, nearly all of my photos had been horizontal. Vertical vs. horizontal doesn’t make a photo better or worse on it’s own. Here are two photos from my Peanut Butter Chocolate Chip Scones post:
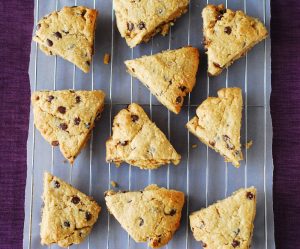
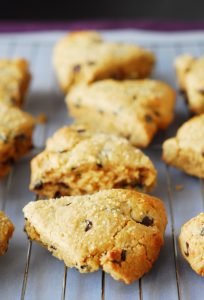
I actually like the way the top one looks better on my blog: it’s a big, eye catching photo. But look how much more real estate the bottom one gets on Pinterest:

It just draws attention better and is more likely to get clicks and/or pins because of it.
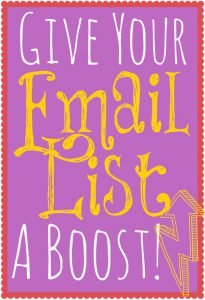
Many people also recommend adding descriptive text to photos. I don’t like to do this because I just want to see the pretty food and a good caption serves the same purpose, but there’s no question these types of photos receive a lot of attention on Pinterest. I do make text-centric buttons for my non-food posts, though, like this post or my Giving Your Email List a Boost! post:
Pin on group Pinterest boards.
You guys. Group Pinterest boards. They are awesome. I have almost 500 followers on Pinterest and usually I’d be excited if I got 10 repins on something I’d pinned to one of my own boards. Many group boards have tens of thousands of followers and I usually get at least thirty repins, plus a lot more organic pins when I pin on them.

You need to be invited to group boards which usually just means emailing the owner or leaving a comment on a pin. You can search for group boards on PinGroupie, even by topic! Keep in mind that you have to follow any group boards you pin to, and if they’re massive boards, your Pinterest feed will be packed with pins to that board. This might be the time to look at a personal Pinterest and one for your blog if you haven’t already. I should have done that from the start and am now trying to figure out what to do about it.
Customize your Pins’ captions.
Did you know you can make Pins from your blog say more than the name of the post? This technique only works if the Pinner is using a plugin (meaning they don’t add it manually within Pinterest), but most do.
I’m not sure if this appears differently in WordPress, but it’s likely similar. I’m using blogger. Just click on the photo when writing or editing your post and select “Properties”.

Then type whatever you’d like your caption to say as the title text!


Super easy! And it gives you the opportunity to give your pins a little more description, which is especially useful if you don’t add text to your photos.
I hope this post was helpful for you! Learning these few tips and tricks totally took my pinning game to a new level. It’s even helped me gain a bit more of a following on there since the things I pin are seen more widely!
For more stuff I’ve put together about growing my blog, check out my Blogger Resources page.
Wow thanks for all this info- it was really helpful and I’m definitely going to have to play around with some of it on Pintrest soon!
Great info! Thanks for sharing at The Southern Special. Tomorrow morning I’ll be featuring this link as one of my host favorites.