Sous Vide Air Removal Methods
I also cover all of this in my cookbooks, Everyday Sous Vide: It’s All French to Me and Sous Vide Meal Prep. Snag the books for lots of amazing sous vide recipes and tips like this one!
Don’t know about sous vide yet, but curious to learn more? Start here! I tell ya about everything you need to get viding.
Who’s ready to get TECHNICAL about all this sous vide goodness? Today, we’re doing a deep dive into sous vide air removal methods.
The sous vide cooking method involves adding food to either a jar or a bag, then dropping that vessel into a waterbath that’s held at a precise temperature with the help of an immersion circulator.
Today, we’re talking specifically about bags and different sous vide air removal methods for them. In order to “vide” successfully, you want to make sure as much air as possible is removed from the bags you’re cooking food in before they go into the waterbath. This prevents them from floating while the food cooks. If the bags were to float, the food wouldn’t cook evenly and cooked be exposed to bacteria, since the food wouldn’t be completely surrounded by temperature controlled water. Get it?
The Methods
1. The “arm” method
I actually didn’t even cover this method in my book, because it’s not the greatest method. It works well for “soupier” foods, like meat in a marinade, because it occupies the bottom of the bag from edge to edge.
You put food into a freezer grade zipper top bag and squish it all to the bottom. Lay it flat on the counter and zip the bag almost all the way close. Place one arm above the food, as close to the food as you can, then take the other and slide it from your other arm to the top of the bag to push the air out. You can replace the bottom arm with the edge of your counter top, too.
Here’s the video showing you how:
2. The water displacement method
This method is similar to the “arm” method and works shockingly well. Use this method for food in a marinade or anything that’s more “delicate” and could be damaged by more extreme sous vide air removal methods.
Again, put your food in a freezer grade zipper top bag. Fill a large container with water. Pro tip: use your waterbath before you start heating it. Zip the bag almost all the way closed. Making sure to keep the zipper out of the water, press the bottom of the bag into the water, directly the air towards the opening in the zipper. Submerge until just the zipper is above the water, then zip the rest of the way closed.
Here’s the vid:
3. Reusable Vacuum Seal Bag
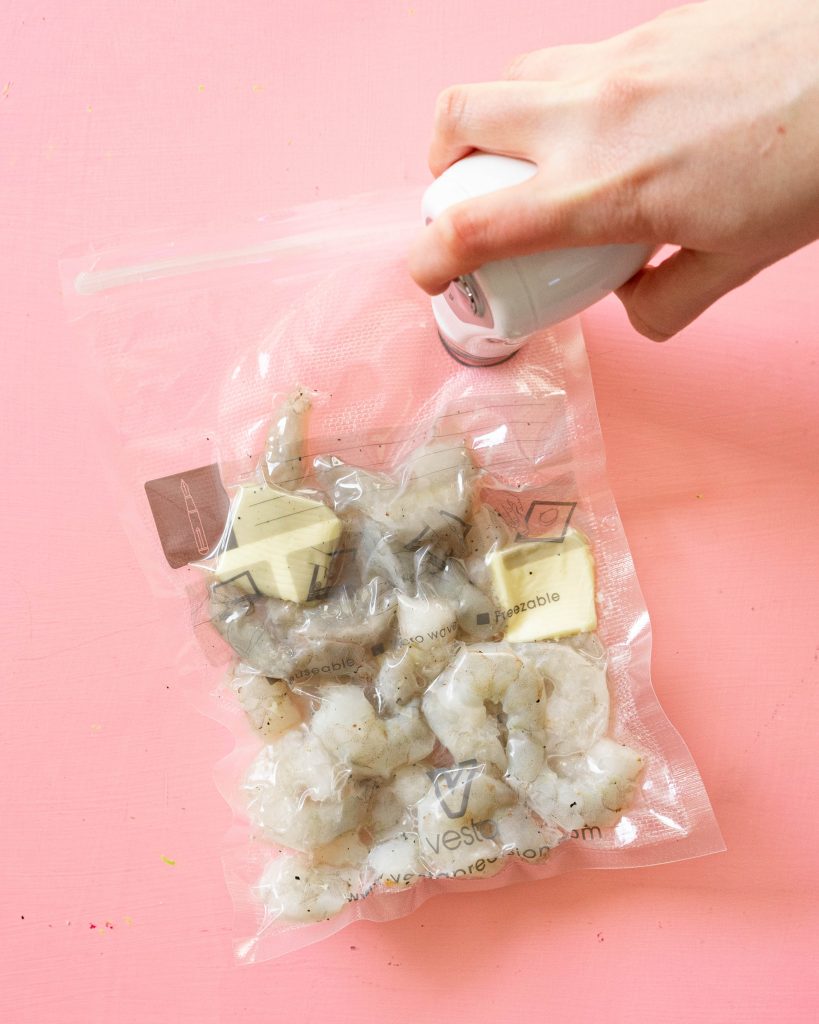
Reusable vacuum seal bags are a great sous vide air removal option because they’re designed for sous vide, easy to use, super affordable, and one of the greener options.
The downside: they’re a pain in the butt to clean. I turn them inside out, rinse, dishwash, then turn right side out and let air dry.
Place the food in the bag then seal it completely. Use the little hand pump that comes with the bag to suck out all the air. Easy, peezy.
Watch it happen:
4. Vacuum Seal
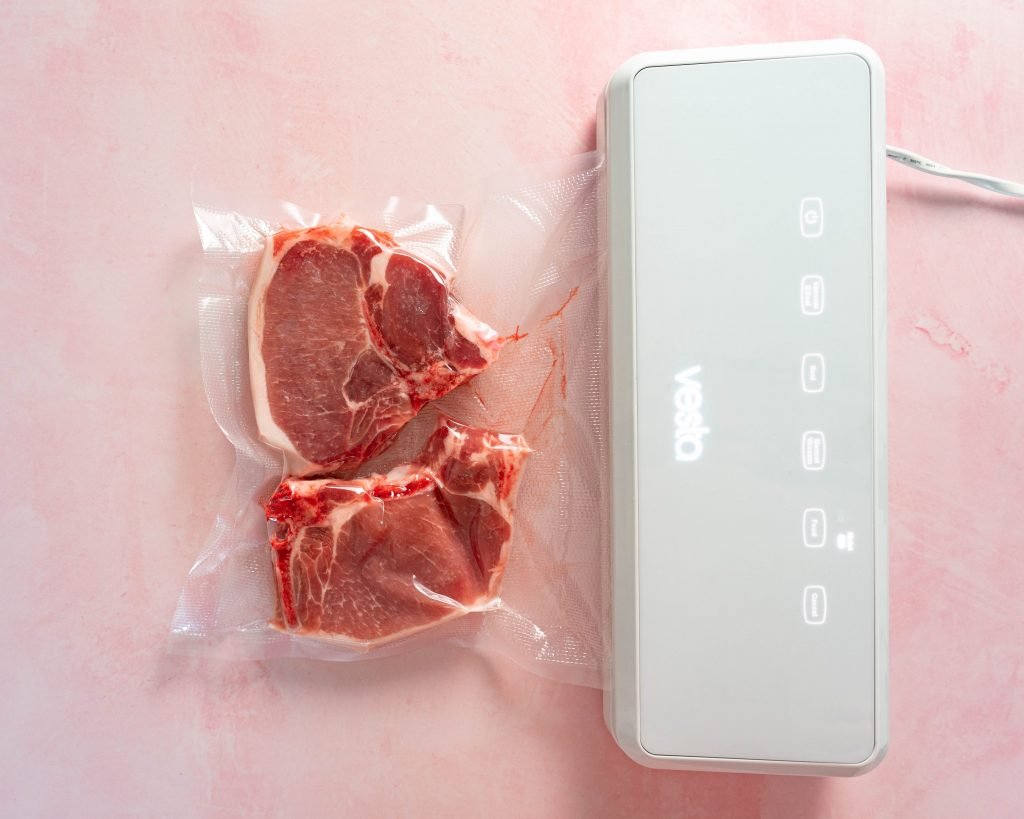
The last sous vide air removal method is certainly the easiest, and the most sure-fire. We’re talking your standard, expensive vacuum sealer.
For the record, I’ve had the cheapest model of the Foodsaver sealers for years and it’s worked just fine. We’re talkin’ $60.
The great things about the vacuum sealer: you will never question the seal, your food will easily sink, you don’t have to worry about keeping the seal above water, and you don’t have to wash anything after. It’s just easy.
You can also season food, vacuum seal it, throw it in the freezer, then put it straight into a waterbath when you’re ready for dinner.
Here’s how it works.
I purchased the reusable plastic seal bags after seeing them on this site. They work great, but like you said, they’re a pain to clean. My solution is to first put the food into the freezer ziplock bag, then put that bag into the vacuum seal bag. That keeps the vacuum seal bag nice and clean!
I wish you had a video of using a jar with a juicy marinade.
I don’t cook proteins in jars – only egg bites and desserts!
Found this video after my wife got me both cookbooks for my birthday. Love the QR codes! Never heard of the arm method, but I like it. Recipes look great-can’t wait to try the egg bites!!
I’m so glad!!! The QR codes were one of my favorite parts of the book 🙂